
Wallpaper seams drive people absolutely crazy when they start acting up. One day everything looks perfect, then suddenly there’s this annoying gap or lifted edge that catches the light wrong and becomes all you can see when you walk into the room.
The thing about seam problems is they rarely happen right away. Usually takes a few weeks or even months before issues start showing up. By then you’ve forgotten exactly what went wrong during installation, which makes figuring out how to fix wallpaper seams more complicated than it should be.
Temperature is actually a huge factor most people ignore
Room conditions during installation matter way more than anyone realizes. Hot rooms cause paste to dry too fast. Cold rooms keep everything wet too long. Either situation can mess up seam bonding in different ways.
Direct sunlight hitting fresh wallpaper creates uneven drying patterns that don’t show up until later. Windows on the south side of houses are particularly problematic for this reason. Even heating vents can cause localized drying that affects how seams behave over time.
Quick fixes that actually work sometimes
Lifted edges often respond to simple moisture reactivation if you catch them early enough. Hold a clothes iron several inches away and let the steam penetrate behind the lifted section. Too close and you’ll damage the wallpaper. Too far away and nothing happens.
Read More: How Solar Contractors in NJ Help Homeowners Transition to Solar
For edges that won’t stay down with moisture alone, injecting tiny amounts of fresh adhesive usually does the trick. Use a small artist’s brush or cotton swab to work new paste behind the loose section. Clean off any excess immediately before it dries.
Gaps between strips are different beasts entirely
Gaps usually mean the wallpaper has shrunk, which can’t really be undone. Small gaps might be disguised with matching paint or wallpaper markers, but this only works if the gap is minimal and the pattern allows for it.
Caulk represents another option for narrow gaps. Paintable acrylic caulk can be tinted to match, though it becomes more obvious under close inspection. Still better than a visible gap in most cases.
Wider gaps really need the affected strips removed and rehung properly. Sounds extreme, but trying to hide major gaps usually looks worse than the original problem. Plus, if one seam has shrunk significantly, others probably will too.
When professionals get involved, techniques get more aggressive
Professional paperhangers have tricks that go beyond basic repair methods. Double-cutting involves cutting through overlapping seams to create perfect butt joints, then removing excess material and smoothing everything down. Requires steady hands and really sharp tools.
Read More: Why Hiring a Licensed Electrician-Round-Rock Is Essential for Your Home and Business
Heat application using professional steamers provides more controlled moisture than household equipment. The goal is precise adhesive reactivation without damaging wallpaper surfaces or causing uneven expansion.
Learning how to fix wallpaper seams helps prevent future disasters
Room conditioning before installation eliminates many common seam problems. Maintaining stable temperature and humidity levels throughout the installation process and for several days afterward gives seams the best chance of staying tight.
Adhesive consistency matters enormously. Paste that’s mixed too thick or too thin affects how seams bond. Working time also plays a role – rushing through installation often leads to seam problems that show up later.
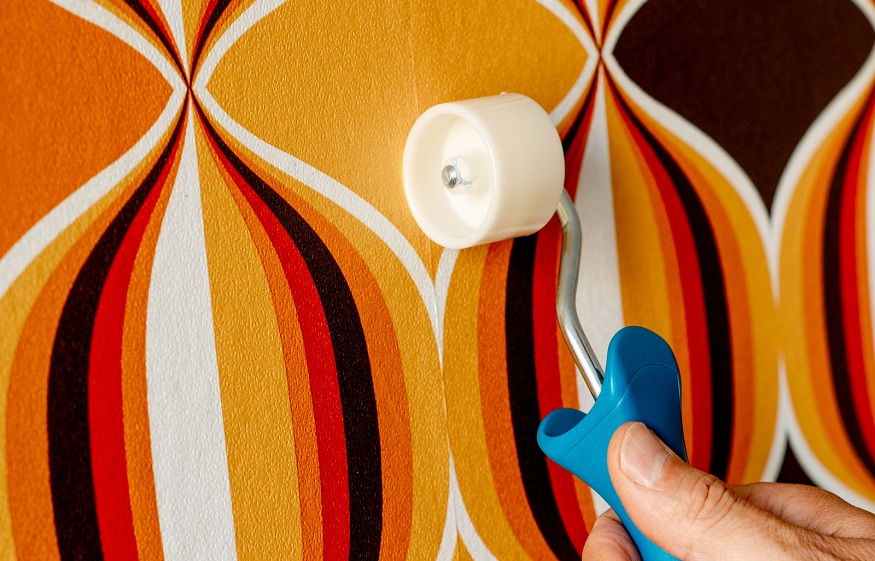
Tool quality makes more difference than most people expect. Cheap seam rollers can actually damage wallpaper or fail to create proper pressure along seam lines. Sharp cutting tools prevent ragged edges that don’t join properly.
The reality is that seam problems usually trace back to installation issues, but understanding repair techniques can often salvage projects that would otherwise need complete redoing. Most seam issues are fixable if addressed promptly with appropriate methods and realistic expectations about what can actually be accomplished.